Skip to Main Content

- City Departments
-
-
Community Development
-
Community Response
-
Convention and Cultural Services
-
Finance
-
Fire Department
-
Human Resources
-
Information Technology
-
Mayor and Council
-
Office of Public Safety Accountability
-
Office of the City Attorney
-
Office of the City Auditor
-
Office of the City Clerk
-
Office of the City Manager
-
Office of the City Treasurer
-
Police Department
-
Public Works
-
Utilities
-
Youth, Parks, & Community Enrichment
-
- Browse by categories
-
-
hiking Activities
-
pets Animals & Pets
-
domain_add Building & Planning
-
store Business
-
account_tree City Administration
-
category City Assets & Data
-
explore City Regions
-
diversity_4 Community Support
-
theater_comedy Culture & History
-
business_center Employment
-
directions Infrastructure
-
gavel Law, Code & Compliance
-
payments Money
-
park Outdoors & Sustainability
-
local_police Safety
-
directions_car Transportation
-
delete_sweep Utility Services
-
Use the menus above to navigate by City Departments or Categories.
Department
Community Development
Department
Community Response
Department
Convention and Cultural Services
Department
Finance
Department
Fire Department
Department
Human Resources
Department
Information Technology
Department
Mayor and Council
Department
Office of Public Safety Accountability
Department
Office of the City Attorney
Department
Office of the City Auditor
Department
Office of the City Clerk
Department
Office of the City Manager
Department
Office of the City Treasurer
Department
Police Department
Department
Public Works
Department
Utilities
Department
Youth, Parks, & Community Enrichment
Category
hiking
Activities
Arts & Culture
- Convention and Cultural Services
- Arts and Culture
- Convention and Cultural Services
- Convention and Cultural Services
- Convention and Cultural Services
- Convention and Cultural Services
- City of Sacramento
- Entertainment Services Division
- Arts and Culture
- Arts and Culture
- Arts and Culture
- Mayor Kevin McCarty
- Arts and Culture
- Arts and Culture
- Convention and Cultural Services
- Public Works
- Arts and Culture
- Mayor Kevin McCarty
- District 6 - Eric Guerra
Camps
- Access Leisure
- Youth, Parks, & Community Enrichment
- Youth, Parks, & Community Enrichment
- Youth, Parks, & Community Enrichment
Classes & Group Activities
- Youth, Parks, & Community Enrichment
- Arts and Culture
- Community Engagement
- Community Engagement
- Youth, Parks, & Community Enrichment
- Older Adult Services
- Youth, Parks, & Community Enrichment
- Youth Workforce Development
- Older Adult Services
- Youth, Parks, & Community Enrichment
- Planning
- Arts and Culture
- Youth, Parks, & Community Enrichment
- Arts and Culture
- Youth, Parks, & Community Enrichment
- Youth, Parks, & Community Enrichment
- Youth, Parks, & Community Enrichment
- City of Sacramento
Community Centers
- Arts and Culture
- Youth, Parks, & Community Enrichment
- Youth, Parks, & Community Enrichment
- Youth, Parks, & Community Enrichment
- Older Adult Services
- Youth, Parks, & Community Enrichment
- City of Sacramento
Events & Entertainment
- Parking
- Innovation and Economic Development
- Aquatics
- Arts and Culture
- Convention and Cultural Services
- Cannabis Management
- Convention and Cultural Services
- Arts and Culture
- Community Engagement
- Office of Public Safety Accountability
- Arts and Culture
- Arts and Culture
- District 7 - Rick Jennings
- Police Department
- Convention and Cultural Services
- Convention and Cultural Services
- Fire Department
- Youth, Parks, & Community Enrichment
- Recycling & Solid Waste
- Arts and Culture
- Arts and Culture
- Planning
- Convention and Cultural Services
- Convention and Cultural Services
- Convention and Cultural Services
- Mayor Kevin McCarty
- Recycling & Solid Waste
- Entertainment Services Division
- Entertainment Services Division
- City of Sacramento
Sports
- Youth, Parks, & Community Enrichment
- Access Leisure
- Youth, Parks, & Community Enrichment
- Youth, Parks, & Community Enrichment
- Youth, Parks, & Community Enrichment
- Parks
- Mayor Kevin McCarty
- Parks
- Youth, Parks, & Community Enrichment
- Youth, Parks, & Community Enrichment
Swimming
- Youth, Parks, & Community Enrichment
- Youth, Parks, & Community Enrichment
- Youth, Parks, & Community Enrichment
- Aquatics
- Youth, Parks, & Community Enrichment
- City of Sacramento
Category
pets
Animals & Pets
Animals & Pets
- Animal Care
- Animal Care
- Community Development
- Animal Care
- Animal Care
- Animal Care
- Animal Care
- Animal Care
- Animal Care
- Parks
- Animal Care
- Animal Care
Category
domain_add
Building & Planning
Construction
- Maintenance Services
- Planning
- City of Sacramento
- Community Development
- Building
- Community Development
- Building
- Building
- Building
- Building
- Recycling & Solid Waste
- Recycling & Solid Waste
- Maintenance Services
- Procurement Services Division
- Parks
- Utilities
- Public Works
- Engineering
- Fire Department
- Arts and Culture
- Building
- Building
- Building
- Building
- Engineering
- City of Sacramento
- Public Works
- Planning
- Mayor Kevin McCarty
- Engineering
- Planning
- Planning
Inspections
- Community Development
- Building
- Recycling & Solid Waste
- Fire Department
- Fire Department
- Fire Department
- Code Compliance
Planning
- Community Development
- Community Development
- Community Development
- Innovation and Economic Development
- Planning
- Planning
- Planning
- Climate Action and Sustainability
- Planning
- Planning
- Arts and Culture
- Public Works
- Parks
- Community Development
- Community Development
- Office of the City Manager
- Public Works
- Planning
- Planning
- Public Works
- Mobility and Sustainability
- Transportation
- Planning
- Planning
Property Lines & Surveying
- Arts and Culture
- Engineering
Zoning
- Planning
- Planning
- Community Development
- Arts and Culture
- Innovation and Economic Development
- Planning
- Planning
Category
store
Business
Business
- City of Sacramento
- Innovation and Economic Development
- Code Compliance
- Revenue Division
- Revenue Division
- Innovation and Economic Development
- Finance
- Recycling & Solid Waste
- Entertainment Services Division
- Innovation and Economic Development
- Innovation and Economic Development
- Procurement Services Division
- Mayor Kevin McCarty
- Revenue Division
- Innovation and Economic Development
- Planning
Cannabis
- Office of the City Auditor
- Office of the City Auditor
- Cannabis Management
- Cannabis Management
- Cannabis Management
- Revenue Division
- Cannabis Management
- Finance
- Cannabis Management
- Office of the City Auditor
- Cannabis Management
- Planning
Economic Development
- Parking
- Office of the City Manager
- Engineering
- Innovation and Economic Development
- Innovation and Economic Development
- Innovation and Economic Development
- Arts and Culture
- Community Engagement
- Innovation and Economic Development
- Innovation and Economic Development
- Innovation and Economic Development
- District 1 - Lisa Kaplan
- Transportation Planning
- Innovation and Economic Development
- Office of the City Manager
- Innovation and Economic Development
- Innovation and Economic Development
- Arts and Culture
- Innovation and Economic Development
- Innovation and Economic Development
- Mayor Kevin McCarty
- Mayor Kevin McCarty
- Innovation and Economic Development
- Mayor Kevin McCarty
- Innovation and Economic Development
Innovation
- Information Technology
- Information Technology
- Engineering
- Arts and Culture
- Office of the City Manager
- Innovation and Economic Development
- District 6 - Eric Guerra
Suppliers & Vendors
- Finance
- Finance
- Police Department
- Procurement Services Division
- City of Sacramento
- Arts and Culture
- Code Compliance
- Code Compliance
- Recycling & Solid Waste
- Procurement Services Division
- Procurement Services Division
- City of Sacramento
- Recycling & Solid Waste
- Procurement Services Division
- Finance
- Procurement Services Division
- Finance
- Procurement Services Division
- Procurement Services Division
Category
account_tree
City Administration
Accountability & Oversight
- Office of the City Auditor
- Police Department
- Office of the City Auditor
- Office of the City Auditor
- Finance
- Office of the City Clerk
- Arts and Culture
- City of Sacramento
- Youth, Parks, & Community Enrichment
- Arts and Culture
- Public Works
- Diversity and Equity
- Office of the City Clerk
- Office of the City Auditor
Boards & Commissions
- Community Development
- Community Development
- Community Development
- Community Development
- Community Development
- Office of the City Clerk
- District 5 - Caity Maple
- District 1 - Lisa Kaplan
- District 2 - Roger Dickinson
- District 5 - Caity Maple
- Office of the City Auditor
- Arts and Culture
- Youth, Parks, & Community Enrichment
- Police Department
City Attorney
- City of Sacramento
- Office of the City Clerk
City Manager
- Office of the City Manager
- Office of the City Manager
- Office of the City Manager
- Community Engagement
- Community Engagement
- Community Engagement
- Arts and Culture
- Office of the City Manager
- Innovation and Economic Development
- Office of the City Manager
- Office of the City Manager
- Office of the City Manager
- City of Sacramento
City Structure & Policies
- Planning
- Arts and Culture
- City of Sacramento
- Engineering
- City of Sacramento
- Planning
- City of Sacramento
- Office of the City Manager
- Engineering
- City of Sacramento
- City of Sacramento
- City of Sacramento
Customer Service
- Information Technology
- Information Technology
- Youth, Parks, & Community Enrichment
- Arts and Culture
- Parking
- Youth, Parks, & Community Enrichment
- Finance
- Utilities
- Utilities
- Building
- Office of Public Safety Accountability
- Utilities
- Police Department
- Police Department
- Marina
- Police Department
- Police Department
- Police Department
Elections
- Office of the City Clerk
- City of Sacramento
Mayor & City Council
- Office of the City Clerk
- Arts and Culture
- Arts and Culture
- Mayor and Council
- Mayor and Council
- Mayor and Council
- Mayor and Council
- Mayor and Council
- Mayor and Council
- Mayor and Council
- Mayor and Council
- Mayor and Council
- Mayor and Council
- City of Sacramento
- Diversity and Equity
- Office of the City Clerk
Transparency
- Office of the City Auditor
- Office of Public Safety Accountability
- Office of the City Attorney
- Office of the City Auditor
- Office of the City Auditor
- Police Department
- Maps and Geographic Information Systems
- Office of Public Safety Accountability
- Police Department
- City of Sacramento
- Office of the City Auditor
Category
category
City Assets & Data
City Buildings & Property
- Planning
- Planning
- Planning
- Planning
- Arts and Culture
- Public Works
- Recycling & Solid Waste
- Arts and Culture
- Police Department
- Facilities & Real Property Management
- Public Works
- Youth, Parks, & Community Enrichment
City Vehicles
- Climate Action and Sustainability
- Public Works
- Public Works
Records
- Community Development
- Community Development
- Community Development
- Community Development
- Community Development
- Community Development
- Community Development
- Planning
- Police Department
- Convention and Cultural Services
- Arts and Culture
- Office of the City Clerk
- District 1 - Lisa Kaplan
- City of Sacramento
- Planning
- Maps and Geographic Information Systems
- Arts and Culture
- Office of the City Clerk
- Office of the City Clerk
- Police Department
Transparency
- Office of the City Auditor
- Office of Public Safety Accountability
- Office of the City Attorney
- Office of the City Auditor
- Office of the City Auditor
- Police Department
- Maps and Geographic Information Systems
- Office of Public Safety Accountability
- Police Department
- City of Sacramento
- Office of the City Auditor
Category
explore
City Regions
Council Districts
- Arts and Culture
- Arts and Culture
- Arts and Culture
- Mayor and Council
- Mayor and Council
- Mayor and Council
- Mayor and Council
- Mayor and Council
- Mayor and Council
- Mayor and Council
- Mayor and Council
- Maps and Geographic Information Systems
- Arts and Culture
- Office of the City Clerk
Neighborhoods
- Arts and Culture
- Planning
- Arts and Culture
- Arts and Culture
- Planning
- Planning
- Engineering
- Police Department
- Innovation and Economic Development
- Community Engagement
- Youth Workforce Development
- Arts and Culture
- Innovation and Economic Development
- Arts and Culture
- Transportation Planning
- Arts and Culture
- Planning
- Planning
- Arts and Culture
Property Lines & Surveying
- Arts and Culture
- Engineering
Zoning
- Planning
- Planning
- Community Development
- Arts and Culture
- Innovation and Economic Development
- Planning
- Planning
Category
diversity_4
Community Support
Accessibility
- Parking
- Youth, Parks, & Community Enrichment
- Parks
- Planning
- Arts and Culture
- City of Sacramento
- Parking
- Engineering
- Youth, Parks, & Community Enrichment
- City of Sacramento
- Engineering
- Arts and Culture
- Public Works
- Youth, Parks, & Community Enrichment
- Maintenance Services
- City of Sacramento
- Older Adult Services
- Planning
- Engineering
- City of Sacramento
Community Centers
- Arts and Culture
- Youth, Parks, & Community Enrichment
- Youth, Parks, & Community Enrichment
- Youth, Parks, & Community Enrichment
- Older Adult Services
- Youth, Parks, & Community Enrichment
- City of Sacramento
Community Engagement
- Planning
- Planning
- Planning
- Arts and Culture
- Planning
- Arts and Culture
- Innovation and Economic Development
- Community Engagement
- Innovation and Economic Development
- Office of Public Safety Accountability
- Diversity and Equity
- Join Sacramento Fire
- Innovation and Economic Development
- Office of the City Auditor
- District 2 - Roger Dickinson
- Arts and Culture
- Responding to Homelessness
- Fire Department
- Planning
- Office of the City Manager
- Office of the City Manager
- Police Department
- Police Department
- Youth Workforce Development
- Arts and Culture
- Police Department
- Community Development
- Arts and Culture
- Planning
- Diversity and Equity
- Youth Civic Engagement
- Transportation Planning
- Older Adult Services
- Transportation Planning
Diversity, Equity & Inclusion
- Access Leisure
- Access Leisure
- Access Leisure
- Cannabis Management
- Office of the City Auditor
- Office of the City Auditor
- Arts and Culture
- Arts and Culture
- Arts and Culture
- Human Resources
- Community Engagement
- City of Sacramento
- Innovation and Economic Development
- Police Department
- Arts and Culture
Homelessness
- Community Response
- Mayor Kevin McCarty
- Community Response
- Innovation and Economic Development
- Police Department
- Community Response
- Community Response
- Mayor Kevin McCarty
- Planning
- Office of the City Manager
- Mayor Kevin McCarty
- Mayor Kevin McCarty
- Mayor Kevin McCarty
- Planning
Housing
- Planning
- Mayor Kevin McCarty
- Planning
- Building
- Responding to Homelessness
- Planning
- Planning
- Planning
- Planning
- Planning
- Responding to Homelessness
- Code Compliance
- Planning
- Revenue Division
- Mayor Kevin McCarty
- Innovation and Economic Development
- Mayor Kevin McCarty
- Planning
Older Adults
- Planning
- Youth, Parks, & Community Enrichment
- Older Adult Services
- Youth, Parks, & Community Enrichment
- Arts and Culture
- Older Adult Services
- Youth, Parks, & Community Enrichment
- Youth, Parks, & Community Enrichment
- Older Adult Services
- Planning
- City of Sacramento
Volunteering
- Office of the City Auditor
- Animal Care
- District 7 - Rick Jennings
- Community Engagement
- Police Department
- Youth, Parks, & Community Enrichment
- Police Department
Youth
- Mayor Kevin McCarty
- Youth, Parks, & Community Enrichment
- Parks
- Aquatics
- Arts and Culture
- Arts and Culture
- Arts and Culture
- District 7 - Rick Jennings
- Youth, Parks, & Community Enrichment
- Convention and Cultural Services
- Join Sacramento Fire
- Youth, Parks, & Community Enrichment
- Aquatics
- Youth, Parks, & Community Enrichment
- Aquatics
- Office of the City Auditor
- Arts and Culture
- Police Department
- Youth, Parks, & Community Enrichment
- Arts and Culture
- Arts and Culture
- Youth, Parks, & Community Enrichment
- Police Department
- Youth, Parks, & Community Enrichment
- Youth, Parks, & Community Enrichment
- Youth, Parks, & Community Enrichment
- Youth, Parks, & Community Enrichment
- Youth, Parks, & Community Enrichment
- City of Sacramento
Category
theater_comedy
Culture & History
Arts & Culture
- Convention and Cultural Services
- Arts and Culture
- Convention and Cultural Services
- Convention and Cultural Services
- Convention and Cultural Services
- Convention and Cultural Services
- City of Sacramento
- Entertainment Services Division
- Arts and Culture
- Arts and Culture
- Arts and Culture
- Mayor Kevin McCarty
- Arts and Culture
- Arts and Culture
- Convention and Cultural Services
- Public Works
- Arts and Culture
- Mayor Kevin McCarty
- District 6 - Eric Guerra
Events & Entertainment
- Parking
- Innovation and Economic Development
- Aquatics
- Arts and Culture
- Convention and Cultural Services
- Cannabis Management
- Convention and Cultural Services
- Arts and Culture
- Community Engagement
- Office of Public Safety Accountability
- Arts and Culture
- Arts and Culture
- District 7 - Rick Jennings
- Police Department
- Convention and Cultural Services
- Convention and Cultural Services
- Fire Department
- Youth, Parks, & Community Enrichment
- Recycling & Solid Waste
- Arts and Culture
- Arts and Culture
- Planning
- Convention and Cultural Services
- Convention and Cultural Services
- Convention and Cultural Services
- Mayor Kevin McCarty
- Recycling & Solid Waste
- Entertainment Services Division
- Entertainment Services Division
- City of Sacramento
Sacramento History
- Planning
- Planning
- Arts and Culture
- Convention and Cultural Services
- Parks
- Planning
- Arts and Culture
- Arts and Culture
- Arts and Culture
- Arts and Culture
- Fire Department
- Convention and Cultural Services
- Public Works
- Office of the City Clerk
- Police Department
Category
business_center
Employment
Diversity, Equity & Inclusion
- Access Leisure
- Access Leisure
- Access Leisure
- Cannabis Management
- Office of the City Auditor
- Office of the City Auditor
- Arts and Culture
- Arts and Culture
- Arts and Culture
- Human Resources
- Community Engagement
- City of Sacramento
- Innovation and Economic Development
- Police Department
- Arts and Culture
Employees & Retirees
- Human Resources
- Human Resources
- Human Resources
- Human Resources
- City of Sacramento
- Human Resources
- Finance
Employment
- Youth, Parks, & Community Enrichment
- Human Resources
- Human Resources
- Human Resources
- City of Sacramento
- District 7 - Rick Jennings
- Fire Department
- Youth, Parks, & Community Enrichment
- Fire Department
- Employee & Retiree Benefits
- Youth Workforce Development
- Expanded Learning
- Police Department
- Arts and Culture
Volunteering
- Office of the City Auditor
- Animal Care
- District 7 - Rick Jennings
- Community Engagement
- Police Department
- Youth, Parks, & Community Enrichment
- Police Department
Workforce Development
- Arts and Culture
- Youth Workforce Development
- Innovation and Economic Development
Category
directions
Infrastructure
Bridges
- Engineering
- Engineering
- Engineering
- Engineering
- Transportation Planning
Drinking Water
- Utilities
- Utilities
- Utilities
- Utilities
- Utilities
- Utilities
- Utilities
- City of Sacramento
- Utilities
Information Technology
- Information Technology
- Information Technology
- Information Technology
- Information Technology
- Information Technology
- Information Technology
- Information Technology
- Information Technology
- Information Technology
- City of Sacramento
- Fire Department
- Information Technology
- Information Technology
- Information Technology
- Recycling & Solid Waste
- City of Sacramento
Infrastructure Finance
- Finance
- City of Sacramento
- Finance
- Finance
- Finance
- Finance
- Building
Stormwater & Flooding
- Utilities
- Utilities
- Fire Department
- Utilities
- Utilities
- Utilities
- Utilities
- Utilities
- Utilities
- City of Sacramento
- Fire Department
Streets & Roads
- Maintenance Services
- Arts and Culture
- Arts and Culture
- Utilities
- Public Works
- Maintenance Services
- Public Works
- Public Works
- Police Department
- Arts and Culture
- City of Sacramento
- Engineering
- Maintenance Services
- Maintenance Services
- Maintenance Services
- Maintenance Services
- Recycling & Solid Waste
- Urban Forestry
- Police Department
- Public Works
- Transportation
- Mobility and Sustainability
- Engineering
- Transportation
- Transportation
Trails
- Park Planning & Development
- Arts and Culture
- Parks
- Transportation Planning
- Public Works
- Engineering
- Parks
- Arts and Culture
- Engineering
- Engineering
- Engineering
Wastewater & Sewer
- Utilities
- Utilities
- Utilities
- Utilities
- Utilities
- Utilities
- Utilities
- Utilities
- City of Sacramento
Category
gavel
Law, Code & Compliance
Code Enforcement
- Community Development
- Community Development
- Code Compliance
- Arts and Culture
- Code Compliance
- Community Development
- Code Compliance
- Code Compliance
- Community Development
- Entertainment Services Division
- Fire Department
- Recycling & Solid Waste
- Code Compliance
- Recycling & Solid Waste
- Code Compliance
- Recycling & Solid Waste
- Parking
- Code Compliance
- Building
Inspections
- Community Development
- Building
- Recycling & Solid Waste
- Fire Department
- Fire Department
- Fire Department
- Code Compliance
Law & Code
- Recycling & Solid Waste
- Cannabis Management
- City of Sacramento
- Recycling & Solid Waste
- Recycling & Solid Waste
- Parking
- Parking
- Fire Department
- Police Department
- Recycling & Solid Waste
- Arts and Culture
- Parking
- Parking
- Building
Permits
- Community Development
- Police Department
- Police Department
- Recycling & Solid Waste
- Community Development
- Office of the City Clerk
- Code Compliance
- Revenue Division
- Cannabis Management
- Police Department
- Police Department
- Arts and Culture
- Planning
- Engineering
- Police Department
- Entertainment Services Division
- Convention and Cultural Services
- Planning
- Entertainment Services Division
- Planning
- Public Works
- Mobility and Sustainability
- Fire Department
- Public Works
- Building
- Youth, Parks, & Community Enrichment
- Innovation and Economic Development
- Building
- Police Department
- Public Works
- Planning
- Revenue Division
- Recycling & Solid Waste
- Entertainment Services Division
- Building
- Mayor Kevin McCarty
- Urban Forestry
- Building
- Recycling & Solid Waste
- Planning
Category
payments
Money
Accounting
- Finance
- Finance
- City of Sacramento
- Finance
- Office of the City Auditor
- Recycling & Solid Waste
- Finance
City Budget
- Mayor Kevin McCarty
- Mayor Kevin McCarty
- Office of the City Manager
- Finance
- Finance
- Finance
- City of Sacramento
- Office of the City Manager
- Mayor Kevin McCarty
Claims, Rebates & Discounts
- Access Leisure
- Planning
- Planning
- Utilities
- Older Adult Services
- Recycling & Solid Waste
- Parking
- Recycling & Solid Waste
- Utilities
- Youth, Parks, & Community Enrichment
- Aquatics
- Finance
- Revenue Division
- Youth, Parks, & Community Enrichment
Debt Management
- Office of the City Treasurer
- Office of the City Treasurer
- Office of the City Treasurer
- City of Sacramento
- Office of the City Treasurer
Economic Development
- Parking
- Office of the City Manager
- Engineering
- Innovation and Economic Development
- Innovation and Economic Development
- Innovation and Economic Development
- Arts and Culture
- Community Engagement
- Innovation and Economic Development
- Innovation and Economic Development
- Innovation and Economic Development
- District 1 - Lisa Kaplan
- Transportation Planning
- Innovation and Economic Development
- Office of the City Manager
- Innovation and Economic Development
- Innovation and Economic Development
- Arts and Culture
- Innovation and Economic Development
- Innovation and Economic Development
- Mayor Kevin McCarty
- Mayor Kevin McCarty
- Innovation and Economic Development
- Mayor Kevin McCarty
- Innovation and Economic Development
Grants
- Arts and Culture
- Cannabis Management
- Convention and Cultural Services
- Utilities
- Arts and Culture
- Arts and Culture
- Arts and Culture
- Innovation and Economic Development
- Entertainment Services Division
- Innovation and Economic Development
- Innovation and Economic Development
- Recycling & Solid Waste
- Arts and Culture
- Engineering
- Youth, Parks, & Community Enrichment
Infrastructure Finance
- Finance
- City of Sacramento
- Finance
- Finance
- Finance
- Finance
- Building
Investment & Cash Management
- Office of the City Treasurer
- Office of the City Treasurer
- City of Sacramento
- Office of the City Treasurer
Payments & Fees
- Marina
- Building
- Revenue Division
- Cannabis Management
- Recycling & Solid Waste
- Revenue Division
- Utilities
- Utilities
- Fire Department
- Finance
- Community Engagement
- Marina
- Recycling & Solid Waste
- Arts and Culture
- Public Works
- Community Development
- Utilities
- City of Sacramento
- Finance
- Animal Care
- City of Sacramento
- Revenue Division
- Code Compliance
- Utilities
- Youth, Parks, & Community Enrichment
Taxes
- Revenue Division
- Finance
- City of Sacramento
- Innovation and Economic Development
- Office of the City Manager
- Youth, Parks, & Community Enrichment
- Revenue Division
- Finance
- Revenue Division
- Revenue Division
Category
park
Outdoors & Sustainability
Bicycles
- Transportation Planning
- Transportation Planning
- Arts and Culture
- Engineering
- Climate Action and Sustainability
- Planning
- Arts and Culture
- Transportation Planning
- Public Works
- Mobility and Sustainability
- Transportation Planning
- Engineering
- Transportation Planning
- Police Department
- Engineering
- Transportation Planning
Boating
- Public Works
- City of Sacramento
Camps
- Access Leisure
- Youth, Parks, & Community Enrichment
- Youth, Parks, & Community Enrichment
- Youth, Parks, & Community Enrichment
Climate & Sustainability
- Maintenance Services
- Arts and Culture
- Arts and Culture
- Planning
- Planning
- Climate Action and Sustainability
- Climate Action and Sustainability
- Mobility and Sustainability
- Climate Action and Sustainability
- Arts and Culture
- Planning
- Public Works
- Public Works
- Procurement Services Division
- Recycling & Solid Waste
- Climate Action and Sustainability
- Building
- Recycling & Solid Waste
- Utilities
- Climate Action and Sustainability
- Utilities
Parks
- Youth, Parks, & Community Enrichment
- Arts and Culture
- Arts and Culture
- Youth, Parks, & Community Enrichment
- Public Works
- Youth, Parks, & Community Enrichment
- Youth, Parks, & Community Enrichment
- Arts and Culture
- Information Technology
- Arts and Culture
- Recycling & Solid Waste
- Youth, Parks, & Community Enrichment
- Youth, Parks, & Community Enrichment
- City of Sacramento
Scooters
- Transportation Planning
- Mobility and Sustainability
- Police Department
Sports
- Youth, Parks, & Community Enrichment
- Access Leisure
- Youth, Parks, & Community Enrichment
- Youth, Parks, & Community Enrichment
- Youth, Parks, & Community Enrichment
- Parks
- Mayor Kevin McCarty
- Parks
- Youth, Parks, & Community Enrichment
- Youth, Parks, & Community Enrichment
Swimming
- Youth, Parks, & Community Enrichment
- Youth, Parks, & Community Enrichment
- Youth, Parks, & Community Enrichment
- Aquatics
- Youth, Parks, & Community Enrichment
- City of Sacramento
Trails
- Park Planning & Development
- Arts and Culture
- Parks
- Transportation Planning
- Public Works
- Engineering
- Parks
- Arts and Culture
- Engineering
- Engineering
- Engineering
Trees
- Urban Forestry
- Parks
- Public Works
- Parks
- City of Sacramento
- Urban Forestry
- Urban Forestry
- Urban Forestry
- Climate Action and Sustainability
- Maintenance Services
Weather
- Fire Department
- Fire Department
- Planning
- Planning
- Parks
Category
local_police
Safety
Alternative Response
- Community Response
- Community Response
- City of Sacramento
- Office of the City Manager
Crime
- Police Department
- Police Department
- Police Department
- Police Department
- Police Department
- Police Department
- Police Department
- Police Department
- Police Department
- Fire Department
- Police Department
- Police Department
- Police Department
- Utilities
- Police Department
- Office of the City Auditor
- Office of the City Auditor
Emergency Management
- Fire Department
- Fire Department
- Join Sacramento Fire
- Fire Department
Emergency Response
- Fire Department
- Police Department
- Fire Department
- Join Sacramento Fire
- Join Sacramento Fire
- Emergency Management
Fire
- Fire Department
- Fire Department
- Fire Department
- Fire Department
- City of Sacramento
- Fire Department
- Fire Department
- Fire Department
- City of Sacramento
- Fire Department
Inspections
- Community Development
- Building
- Recycling & Solid Waste
- Fire Department
- Fire Department
- Fire Department
- Code Compliance
Police Department
- Police Department
- Police Department
- Police Department
- Police Department
- Police Department
- Police Department
- Police Department
- Police Department
- Police Department
- Police Department
- Police Department
- Police Department
- Police Department
- Police Department
- Police Department
- City of Sacramento
- Police Department
- City of Sacramento
- Police Department
- Police Department
- Police Department
- Police Department
- Police Department
- Police Department
- Police Department
- Police Department
- Police Department
- Police Department
- Police Department
Prevention & Personal Safety
- Emergency Management
- Police Department
- Information Technology
- Utilities
- Fire Department
- District 1 - Lisa Kaplan
- Mobility and Sustainability
Stormwater & Flooding
- Utilities
- Utilities
- Fire Department
- Utilities
- Utilities
- Utilities
- Utilities
- Utilities
- Utilities
- City of Sacramento
- Fire Department
Weather
- Fire Department
- Fire Department
- Planning
- Planning
- Parks
Category
directions_car
Transportation
Bicycles
- Transportation Planning
- Transportation Planning
- Arts and Culture
- Engineering
- Climate Action and Sustainability
- Planning
- Arts and Culture
- Transportation Planning
- Public Works
- Mobility and Sustainability
- Transportation Planning
- Engineering
- Transportation Planning
- Police Department
- Engineering
- Transportation Planning
Boating
- Public Works
- City of Sacramento
Driving
- Mobility and Sustainability
- Mobility and Sustainability
- Engineering
- Transportation Planning
- Arts and Culture
- Transportation
- Transportation Planning
- Public Works
- Transportation Planning
- Police Department
Electric Vehicles
- Parking
- Public Works
- Climate Action and Sustainability
Parking
- Police Department
- Marina
- Marina
- Mobility and Sustainability
- Public Works
- Planning
- City of Sacramento
- Public Works
- Transportation Planning
- Recycling & Solid Waste
- Public Works
Public Transportation
- Transportation Planning
- Engineering
- Transportation Planning
- Arts and Culture
- Engineering
- Engineering
- Transportation Planning
- Engineering
- Public Works
- Mobility and Sustainability
- Engineering
- Planning
Scooters
- Transportation Planning
- Mobility and Sustainability
- Police Department
Traffic
- Engineering
- Public Works
- City of Sacramento
- Public Works
- Police Department
- Police Department
- Public Works
- Transportation Planning
- Transportation
- Transportation Planning
- Transportation
- Transportation
- Engineering
- Transportation Planning
Walking
- Transportation Planning
- Arts and Culture
- Arts and Culture
- Arts and Culture
- Transportation Planning
- Engineering
- Transportation
- Transportation Planning
Category
delete_sweep
Utility Services
Drinking Water
- Utilities
- Utilities
- Utilities
- Utilities
- Utilities
- Utilities
- Utilities
- City of Sacramento
- Utilities
Recycling
- Recycling & Solid Waste
- Recycling & Solid Waste
- Recycling & Solid Waste
- Recycling & Solid Waste
- Recycling & Solid Waste
- Recycling & Solid Waste
- Recycling & Solid Waste
- Public Works
- Climate Action and Sustainability
- Recycling & Solid Waste
Trash
- Recycling & Solid Waste
- Recycling & Solid Waste
- Recycling & Solid Waste
- Recycling & Solid Waste
- Recycling & Solid Waste
- Recycling & Solid Waste
- Recycling & Solid Waste
- Recycling & Solid Waste
- Public Works
- Climate Action and Sustainability
- Recycling & Solid Waste
Wastewater & Sewer
- Utilities
- Utilities
- Utilities
- Utilities
- Utilities
- Utilities
- Utilities
- Utilities
- City of Sacramento
- City Departments
-
-
Community Development
-
Community Response
-
Convention and Cultural Services
-
Finance
-
Fire Department
-
Human Resources
-
Information Technology
-
Mayor and Council
-
Office of Public Safety Accountability
-
Office of the City Attorney
-
Office of the City Auditor
-
Office of the City Clerk
-
Office of the City Manager
-
Office of the City Treasurer
-
Police Department
-
Public Works
-
Utilities
-
Youth, Parks, & Community Enrichment
-
- Browse by categories
-
-
hiking Activities
-
pets Animals & Pets
-
domain_add Building & Planning
-
store Business
-
account_tree City Administration
-
category City Assets & Data
-
explore City Regions
-
diversity_4 Community Support
-
theater_comedy Culture & History
-
business_center Employment
-
directions Infrastructure
-
gavel Law, Code & Compliance
-
payments Money
-
park Outdoors & Sustainability
-
local_police Safety
-
directions_car Transportation
-
delete_sweep Utility Services
-
Use the menus above to navigate by City Departments or Categories.
You can also use the Search function below to find specific content on our site.
Department
Community Development
Department
Community Response
Department
Convention and Cultural Services
Department
Finance
Department
Fire Department
Department
Human Resources
Department
Information Technology
Department
Mayor and Council
Department
Office of Public Safety Accountability
Department
Office of the City Attorney
Department
Office of the City Auditor
Department
Office of the City Clerk
Department
Office of the City Manager
Department
Office of the City Treasurer
Department
Police Department
Department
Public Works
Department
Utilities
Department
Youth, Parks, & Community Enrichment
Category
hiking
Activities
Arts & Culture
- Convention and Cultural Services
- Arts and Culture
- Convention and Cultural Services
- Convention and Cultural Services
- Convention and Cultural Services
- Convention and Cultural Services
- City of Sacramento
- Entertainment Services Division
- Arts and Culture
- Arts and Culture
- Arts and Culture
- Mayor Kevin McCarty
- Arts and Culture
- Arts and Culture
- Convention and Cultural Services
- Public Works
- Arts and Culture
- Mayor Kevin McCarty
- District 6 - Eric Guerra
Camps
- Access Leisure
- Youth, Parks, & Community Enrichment
- Youth, Parks, & Community Enrichment
- Youth, Parks, & Community Enrichment
Classes & Group Activities
- Youth, Parks, & Community Enrichment
- Arts and Culture
- Community Engagement
- Community Engagement
- Youth, Parks, & Community Enrichment
- Older Adult Services
- Youth, Parks, & Community Enrichment
- Youth Workforce Development
- Older Adult Services
- Youth, Parks, & Community Enrichment
- Planning
- Arts and Culture
- Youth, Parks, & Community Enrichment
- Arts and Culture
- Youth, Parks, & Community Enrichment
- Youth, Parks, & Community Enrichment
- Youth, Parks, & Community Enrichment
- City of Sacramento
Community Centers
- Arts and Culture
- Youth, Parks, & Community Enrichment
- Youth, Parks, & Community Enrichment
- Youth, Parks, & Community Enrichment
- Older Adult Services
- Youth, Parks, & Community Enrichment
- City of Sacramento
Events & Entertainment
- Parking
- Innovation and Economic Development
- Aquatics
- Arts and Culture
- Convention and Cultural Services
- Cannabis Management
- Convention and Cultural Services
- Arts and Culture
- Community Engagement
- Office of Public Safety Accountability
- Arts and Culture
- Arts and Culture
- District 7 - Rick Jennings
- Police Department
- Convention and Cultural Services
- Convention and Cultural Services
- Fire Department
- Youth, Parks, & Community Enrichment
- Recycling & Solid Waste
- Arts and Culture
- Arts and Culture
- Planning
- Convention and Cultural Services
- Convention and Cultural Services
- Convention and Cultural Services
- Mayor Kevin McCarty
- Recycling & Solid Waste
- Entertainment Services Division
- Entertainment Services Division
- City of Sacramento
Sports
- Youth, Parks, & Community Enrichment
- Access Leisure
- Youth, Parks, & Community Enrichment
- Youth, Parks, & Community Enrichment
- Youth, Parks, & Community Enrichment
- Parks
- Mayor Kevin McCarty
- Parks
- Youth, Parks, & Community Enrichment
- Youth, Parks, & Community Enrichment
Swimming
- Youth, Parks, & Community Enrichment
- Youth, Parks, & Community Enrichment
- Youth, Parks, & Community Enrichment
- Aquatics
- Youth, Parks, & Community Enrichment
- City of Sacramento
Category
pets
Animals & Pets
Animals & Pets
- Animal Care
- Animal Care
- Community Development
- Animal Care
- Animal Care
- Animal Care
- Animal Care
- Animal Care
- Animal Care
- Parks
- Animal Care
- Animal Care
Category
domain_add
Building & Planning
Construction
- Maintenance Services
- Planning
- City of Sacramento
- Community Development
- Building
- Community Development
- Building
- Building
- Building
- Building
- Recycling & Solid Waste
- Recycling & Solid Waste
- Maintenance Services
- Procurement Services Division
- Parks
- Utilities
- Public Works
- Engineering
- Fire Department
- Arts and Culture
- Building
- Building
- Building
- Building
- Engineering
- City of Sacramento
- Public Works
- Planning
- Mayor Kevin McCarty
- Engineering
- Planning
- Planning
Inspections
- Community Development
- Building
- Recycling & Solid Waste
- Fire Department
- Fire Department
- Fire Department
- Code Compliance
Planning
- Community Development
- Community Development
- Community Development
- Innovation and Economic Development
- Planning
- Planning
- Planning
- Climate Action and Sustainability
- Planning
- Planning
- Arts and Culture
- Public Works
- Parks
- Community Development
- Community Development
- Office of the City Manager
- Public Works
- Planning
- Planning
- Public Works
- Mobility and Sustainability
- Transportation
- Planning
- Planning
Property Lines & Surveying
- Arts and Culture
- Engineering
Zoning
- Planning
- Planning
- Community Development
- Arts and Culture
- Innovation and Economic Development
- Planning
- Planning
Category
store
Business
Business
- City of Sacramento
- Innovation and Economic Development
- Code Compliance
- Revenue Division
- Revenue Division
- Innovation and Economic Development
- Finance
- Recycling & Solid Waste
- Entertainment Services Division
- Innovation and Economic Development
- Innovation and Economic Development
- Procurement Services Division
- Mayor Kevin McCarty
- Revenue Division
- Innovation and Economic Development
- Planning
Cannabis
- Office of the City Auditor
- Office of the City Auditor
- Cannabis Management
- Cannabis Management
- Cannabis Management
- Revenue Division
- Cannabis Management
- Finance
- Cannabis Management
- Office of the City Auditor
- Cannabis Management
- Planning
Economic Development
- Parking
- Office of the City Manager
- Engineering
- Innovation and Economic Development
- Innovation and Economic Development
- Innovation and Economic Development
- Arts and Culture
- Community Engagement
- Innovation and Economic Development
- Innovation and Economic Development
- Innovation and Economic Development
- District 1 - Lisa Kaplan
- Transportation Planning
- Innovation and Economic Development
- Office of the City Manager
- Innovation and Economic Development
- Innovation and Economic Development
- Arts and Culture
- Innovation and Economic Development
- Innovation and Economic Development
- Mayor Kevin McCarty
- Mayor Kevin McCarty
- Innovation and Economic Development
- Mayor Kevin McCarty
- Innovation and Economic Development
Innovation
- Information Technology
- Information Technology
- Engineering
- Arts and Culture
- Office of the City Manager
- Innovation and Economic Development
- District 6 - Eric Guerra
Suppliers & Vendors
- Finance
- Finance
- Police Department
- Procurement Services Division
- City of Sacramento
- Arts and Culture
- Code Compliance
- Code Compliance
- Recycling & Solid Waste
- Procurement Services Division
- Procurement Services Division
- City of Sacramento
- Recycling & Solid Waste
- Procurement Services Division
- Finance
- Procurement Services Division
- Finance
- Procurement Services Division
- Procurement Services Division
Category
account_tree
City Administration
Accountability & Oversight
- Office of the City Auditor
- Police Department
- Office of the City Auditor
- Office of the City Auditor
- Finance
- Office of the City Clerk
- Arts and Culture
- City of Sacramento
- Youth, Parks, & Community Enrichment
- Arts and Culture
- Public Works
- Diversity and Equity
- Office of the City Clerk
- Office of the City Auditor
Boards & Commissions
- Community Development
- Community Development
- Community Development
- Community Development
- Community Development
- Office of the City Clerk
- District 5 - Caity Maple
- District 1 - Lisa Kaplan
- District 2 - Roger Dickinson
- District 5 - Caity Maple
- Office of the City Auditor
- Arts and Culture
- Youth, Parks, & Community Enrichment
- Police Department
City Attorney
- City of Sacramento
- Office of the City Clerk
City Manager
- Office of the City Manager
- Office of the City Manager
- Office of the City Manager
- Community Engagement
- Community Engagement
- Community Engagement
- Arts and Culture
- Office of the City Manager
- Innovation and Economic Development
- Office of the City Manager
- Office of the City Manager
- Office of the City Manager
- City of Sacramento
City Structure & Policies
- Planning
- Arts and Culture
- City of Sacramento
- Engineering
- City of Sacramento
- Planning
- City of Sacramento
- Office of the City Manager
- Engineering
- City of Sacramento
- City of Sacramento
- City of Sacramento
Customer Service
- Information Technology
- Information Technology
- Youth, Parks, & Community Enrichment
- Arts and Culture
- Parking
- Youth, Parks, & Community Enrichment
- Finance
- Utilities
- Utilities
- Building
- Office of Public Safety Accountability
- Utilities
- Police Department
- Police Department
- Marina
- Police Department
- Police Department
- Police Department
Elections
- Office of the City Clerk
- City of Sacramento
Mayor & City Council
- Office of the City Clerk
- Arts and Culture
- Arts and Culture
- Mayor and Council
- Mayor and Council
- Mayor and Council
- Mayor and Council
- Mayor and Council
- Mayor and Council
- Mayor and Council
- Mayor and Council
- Mayor and Council
- Mayor and Council
- City of Sacramento
- Diversity and Equity
- Office of the City Clerk
Transparency
- Office of the City Auditor
- Office of Public Safety Accountability
- Office of the City Attorney
- Office of the City Auditor
- Office of the City Auditor
- Police Department
- Maps and Geographic Information Systems
- Office of Public Safety Accountability
- Police Department
- City of Sacramento
- Office of the City Auditor
Category
category
City Assets & Data
City Buildings & Property
- Planning
- Planning
- Planning
- Planning
- Arts and Culture
- Public Works
- Recycling & Solid Waste
- Arts and Culture
- Police Department
- Facilities & Real Property Management
- Public Works
- Youth, Parks, & Community Enrichment
City Vehicles
- Climate Action and Sustainability
- Public Works
- Public Works
Records
- Community Development
- Community Development
- Community Development
- Community Development
- Community Development
- Community Development
- Community Development
- Planning
- Police Department
- Convention and Cultural Services
- Arts and Culture
- Office of the City Clerk
- District 1 - Lisa Kaplan
- City of Sacramento
- Planning
- Maps and Geographic Information Systems
- Arts and Culture
- Office of the City Clerk
- Office of the City Clerk
- Police Department
Transparency
- Office of the City Auditor
- Office of Public Safety Accountability
- Office of the City Attorney
- Office of the City Auditor
- Office of the City Auditor
- Police Department
- Maps and Geographic Information Systems
- Office of Public Safety Accountability
- Police Department
- City of Sacramento
- Office of the City Auditor
Category
explore
City Regions
Council Districts
- Arts and Culture
- Arts and Culture
- Arts and Culture
- Mayor and Council
- Mayor and Council
- Mayor and Council
- Mayor and Council
- Mayor and Council
- Mayor and Council
- Mayor and Council
- Mayor and Council
- Maps and Geographic Information Systems
- Arts and Culture
- Office of the City Clerk
Neighborhoods
- Arts and Culture
- Planning
- Arts and Culture
- Arts and Culture
- Planning
- Planning
- Engineering
- Police Department
- Innovation and Economic Development
- Community Engagement
- Youth Workforce Development
- Arts and Culture
- Innovation and Economic Development
- Arts and Culture
- Transportation Planning
- Arts and Culture
- Planning
- Planning
- Arts and Culture
Property Lines & Surveying
- Arts and Culture
- Engineering
Zoning
- Planning
- Planning
- Community Development
- Arts and Culture
- Innovation and Economic Development
- Planning
- Planning
Category
diversity_4
Community Support
Accessibility
- Parking
- Youth, Parks, & Community Enrichment
- Parks
- Planning
- Arts and Culture
- City of Sacramento
- Parking
- Engineering
- Youth, Parks, & Community Enrichment
- City of Sacramento
- Engineering
- Arts and Culture
- Public Works
- Youth, Parks, & Community Enrichment
- Maintenance Services
- City of Sacramento
- Older Adult Services
- Planning
- Engineering
- City of Sacramento
Community Centers
- Arts and Culture
- Youth, Parks, & Community Enrichment
- Youth, Parks, & Community Enrichment
- Youth, Parks, & Community Enrichment
- Older Adult Services
- Youth, Parks, & Community Enrichment
- City of Sacramento
Community Engagement
- Planning
- Planning
- Planning
- Arts and Culture
- Planning
- Arts and Culture
- Innovation and Economic Development
- Community Engagement
- Innovation and Economic Development
- Office of Public Safety Accountability
- Diversity and Equity
- Join Sacramento Fire
- Innovation and Economic Development
- Office of the City Auditor
- District 2 - Roger Dickinson
- Arts and Culture
- Responding to Homelessness
- Fire Department
- Planning
- Office of the City Manager
- Office of the City Manager
- Police Department
- Police Department
- Youth Workforce Development
- Arts and Culture
- Police Department
- Community Development
- Arts and Culture
- Planning
- Diversity and Equity
- Youth Civic Engagement
- Transportation Planning
- Older Adult Services
- Transportation Planning
Diversity, Equity & Inclusion
- Access Leisure
- Access Leisure
- Access Leisure
- Cannabis Management
- Office of the City Auditor
- Office of the City Auditor
- Arts and Culture
- Arts and Culture
- Arts and Culture
- Human Resources
- Community Engagement
- City of Sacramento
- Innovation and Economic Development
- Police Department
- Arts and Culture
Homelessness
- Community Response
- Mayor Kevin McCarty
- Community Response
- Innovation and Economic Development
- Police Department
- Community Response
- Community Response
- Mayor Kevin McCarty
- Planning
- Office of the City Manager
- Mayor Kevin McCarty
- Mayor Kevin McCarty
- Mayor Kevin McCarty
- Planning
Housing
- Planning
- Mayor Kevin McCarty
- Planning
- Building
- Responding to Homelessness
- Planning
- Planning
- Planning
- Planning
- Planning
- Responding to Homelessness
- Code Compliance
- Planning
- Revenue Division
- Mayor Kevin McCarty
- Innovation and Economic Development
- Mayor Kevin McCarty
- Planning
Older Adults
- Planning
- Youth, Parks, & Community Enrichment
- Older Adult Services
- Youth, Parks, & Community Enrichment
- Arts and Culture
- Older Adult Services
- Youth, Parks, & Community Enrichment
- Youth, Parks, & Community Enrichment
- Older Adult Services
- Planning
- City of Sacramento
Volunteering
- Office of the City Auditor
- Animal Care
- District 7 - Rick Jennings
- Community Engagement
- Police Department
- Youth, Parks, & Community Enrichment
- Police Department
Youth
- Mayor Kevin McCarty
- Youth, Parks, & Community Enrichment
- Parks
- Aquatics
- Arts and Culture
- Arts and Culture
- Arts and Culture
- District 7 - Rick Jennings
- Youth, Parks, & Community Enrichment
- Convention and Cultural Services
- Join Sacramento Fire
- Youth, Parks, & Community Enrichment
- Aquatics
- Youth, Parks, & Community Enrichment
- Aquatics
- Office of the City Auditor
- Arts and Culture
- Police Department
- Youth, Parks, & Community Enrichment
- Arts and Culture
- Arts and Culture
- Youth, Parks, & Community Enrichment
- Police Department
- Youth, Parks, & Community Enrichment
- Youth, Parks, & Community Enrichment
- Youth, Parks, & Community Enrichment
- Youth, Parks, & Community Enrichment
- Youth, Parks, & Community Enrichment
- City of Sacramento
Category
theater_comedy
Culture & History
Arts & Culture
- Convention and Cultural Services
- Arts and Culture
- Convention and Cultural Services
- Convention and Cultural Services
- Convention and Cultural Services
- Convention and Cultural Services
- City of Sacramento
- Entertainment Services Division
- Arts and Culture
- Arts and Culture
- Arts and Culture
- Mayor Kevin McCarty
- Arts and Culture
- Arts and Culture
- Convention and Cultural Services
- Public Works
- Arts and Culture
- Mayor Kevin McCarty
- District 6 - Eric Guerra
Events & Entertainment
- Parking
- Innovation and Economic Development
- Aquatics
- Arts and Culture
- Convention and Cultural Services
- Cannabis Management
- Convention and Cultural Services
- Arts and Culture
- Community Engagement
- Office of Public Safety Accountability
- Arts and Culture
- Arts and Culture
- District 7 - Rick Jennings
- Police Department
- Convention and Cultural Services
- Convention and Cultural Services
- Fire Department
- Youth, Parks, & Community Enrichment
- Recycling & Solid Waste
- Arts and Culture
- Arts and Culture
- Planning
- Convention and Cultural Services
- Convention and Cultural Services
- Convention and Cultural Services
- Mayor Kevin McCarty
- Recycling & Solid Waste
- Entertainment Services Division
- Entertainment Services Division
- City of Sacramento
Sacramento History
- Planning
- Planning
- Arts and Culture
- Convention and Cultural Services
- Parks
- Planning
- Arts and Culture
- Arts and Culture
- Arts and Culture
- Arts and Culture
- Fire Department
- Convention and Cultural Services
- Public Works
- Office of the City Clerk
- Police Department
Category
business_center
Employment
Diversity, Equity & Inclusion
- Access Leisure
- Access Leisure
- Access Leisure
- Cannabis Management
- Office of the City Auditor
- Office of the City Auditor
- Arts and Culture
- Arts and Culture
- Arts and Culture
- Human Resources
- Community Engagement
- City of Sacramento
- Innovation and Economic Development
- Police Department
- Arts and Culture
Employees & Retirees
- Human Resources
- Human Resources
- Human Resources
- Human Resources
- City of Sacramento
- Human Resources
- Finance
Employment
- Youth, Parks, & Community Enrichment
- Human Resources
- Human Resources
- Human Resources
- City of Sacramento
- District 7 - Rick Jennings
- Fire Department
- Youth, Parks, & Community Enrichment
- Fire Department
- Employee & Retiree Benefits
- Youth Workforce Development
- Expanded Learning
- Police Department
- Arts and Culture
Volunteering
- Office of the City Auditor
- Animal Care
- District 7 - Rick Jennings
- Community Engagement
- Police Department
- Youth, Parks, & Community Enrichment
- Police Department
Workforce Development
- Arts and Culture
- Youth Workforce Development
- Innovation and Economic Development
Category
directions
Infrastructure
Bridges
- Engineering
- Engineering
- Engineering
- Engineering
- Transportation Planning
Drinking Water
- Utilities
- Utilities
- Utilities
- Utilities
- Utilities
- Utilities
- Utilities
- City of Sacramento
- Utilities
Information Technology
- Information Technology
- Information Technology
- Information Technology
- Information Technology
- Information Technology
- Information Technology
- Information Technology
- Information Technology
- Information Technology
- City of Sacramento
- Fire Department
- Information Technology
- Information Technology
- Information Technology
- Recycling & Solid Waste
- City of Sacramento
Infrastructure Finance
- Finance
- City of Sacramento
- Finance
- Finance
- Finance
- Finance
- Building
Stormwater & Flooding
- Utilities
- Utilities
- Fire Department
- Utilities
- Utilities
- Utilities
- Utilities
- Utilities
- Utilities
- City of Sacramento
- Fire Department
Streets & Roads
- Maintenance Services
- Arts and Culture
- Arts and Culture
- Utilities
- Public Works
- Maintenance Services
- Public Works
- Public Works
- Police Department
- Arts and Culture
- City of Sacramento
- Engineering
- Maintenance Services
- Maintenance Services
- Maintenance Services
- Maintenance Services
- Recycling & Solid Waste
- Urban Forestry
- Police Department
- Public Works
- Transportation
- Mobility and Sustainability
- Engineering
- Transportation
- Transportation
Trails
- Park Planning & Development
- Arts and Culture
- Parks
- Transportation Planning
- Public Works
- Engineering
- Parks
- Arts and Culture
- Engineering
- Engineering
- Engineering
Wastewater & Sewer
- Utilities
- Utilities
- Utilities
- Utilities
- Utilities
- Utilities
- Utilities
- Utilities
- City of Sacramento
Category
gavel
Law, Code & Compliance
Code Enforcement
- Community Development
- Community Development
- Code Compliance
- Arts and Culture
- Code Compliance
- Community Development
- Code Compliance
- Code Compliance
- Community Development
- Entertainment Services Division
- Fire Department
- Recycling & Solid Waste
- Code Compliance
- Recycling & Solid Waste
- Code Compliance
- Recycling & Solid Waste
- Parking
- Code Compliance
- Building
Inspections
- Community Development
- Building
- Recycling & Solid Waste
- Fire Department
- Fire Department
- Fire Department
- Code Compliance
Law & Code
- Recycling & Solid Waste
- Cannabis Management
- City of Sacramento
- Recycling & Solid Waste
- Recycling & Solid Waste
- Parking
- Parking
- Fire Department
- Police Department
- Recycling & Solid Waste
- Arts and Culture
- Parking
- Parking
- Building
Permits
- Community Development
- Police Department
- Police Department
- Recycling & Solid Waste
- Community Development
- Office of the City Clerk
- Code Compliance
- Revenue Division
- Cannabis Management
- Police Department
- Police Department
- Arts and Culture
- Planning
- Engineering
- Police Department
- Entertainment Services Division
- Convention and Cultural Services
- Planning
- Entertainment Services Division
- Planning
- Public Works
- Mobility and Sustainability
- Fire Department
- Public Works
- Building
- Youth, Parks, & Community Enrichment
- Innovation and Economic Development
- Building
- Police Department
- Public Works
- Planning
- Revenue Division
- Recycling & Solid Waste
- Entertainment Services Division
- Building
- Mayor Kevin McCarty
- Urban Forestry
- Building
- Recycling & Solid Waste
- Planning
Category
payments
Money
Accounting
- Finance
- Finance
- City of Sacramento
- Finance
- Office of the City Auditor
- Recycling & Solid Waste
- Finance
City Budget
- Mayor Kevin McCarty
- Mayor Kevin McCarty
- Office of the City Manager
- Finance
- Finance
- Finance
- City of Sacramento
- Office of the City Manager
- Mayor Kevin McCarty
Claims, Rebates & Discounts
- Access Leisure
- Planning
- Planning
- Utilities
- Older Adult Services
- Recycling & Solid Waste
- Parking
- Recycling & Solid Waste
- Utilities
- Youth, Parks, & Community Enrichment
- Aquatics
- Finance
- Revenue Division
- Youth, Parks, & Community Enrichment
Debt Management
- Office of the City Treasurer
- Office of the City Treasurer
- Office of the City Treasurer
- City of Sacramento
- Office of the City Treasurer
Economic Development
- Parking
- Office of the City Manager
- Engineering
- Innovation and Economic Development
- Innovation and Economic Development
- Innovation and Economic Development
- Arts and Culture
- Community Engagement
- Innovation and Economic Development
- Innovation and Economic Development
- Innovation and Economic Development
- District 1 - Lisa Kaplan
- Transportation Planning
- Innovation and Economic Development
- Office of the City Manager
- Innovation and Economic Development
- Innovation and Economic Development
- Arts and Culture
- Innovation and Economic Development
- Innovation and Economic Development
- Mayor Kevin McCarty
- Mayor Kevin McCarty
- Innovation and Economic Development
- Mayor Kevin McCarty
- Innovation and Economic Development
Grants
- Arts and Culture
- Cannabis Management
- Convention and Cultural Services
- Utilities
- Arts and Culture
- Arts and Culture
- Arts and Culture
- Innovation and Economic Development
- Entertainment Services Division
- Innovation and Economic Development
- Innovation and Economic Development
- Recycling & Solid Waste
- Arts and Culture
- Engineering
- Youth, Parks, & Community Enrichment
Infrastructure Finance
- Finance
- City of Sacramento
- Finance
- Finance
- Finance
- Finance
- Building
Investment & Cash Management
- Office of the City Treasurer
- Office of the City Treasurer
- City of Sacramento
- Office of the City Treasurer
Payments & Fees
- Marina
- Building
- Revenue Division
- Cannabis Management
- Recycling & Solid Waste
- Revenue Division
- Utilities
- Utilities
- Fire Department
- Finance
- Community Engagement
- Marina
- Recycling & Solid Waste
- Arts and Culture
- Public Works
- Community Development
- Utilities
- City of Sacramento
- Finance
- Animal Care
- City of Sacramento
- Revenue Division
- Code Compliance
- Utilities
- Youth, Parks, & Community Enrichment
Taxes
- Revenue Division
- Finance
- City of Sacramento
- Innovation and Economic Development
- Office of the City Manager
- Youth, Parks, & Community Enrichment
- Revenue Division
- Finance
- Revenue Division
- Revenue Division
Category
park
Outdoors & Sustainability
Bicycles
- Transportation Planning
- Transportation Planning
- Arts and Culture
- Engineering
- Climate Action and Sustainability
- Planning
- Arts and Culture
- Transportation Planning
- Public Works
- Mobility and Sustainability
- Transportation Planning
- Engineering
- Transportation Planning
- Police Department
- Engineering
- Transportation Planning
Boating
- Public Works
- City of Sacramento
Camps
- Access Leisure
- Youth, Parks, & Community Enrichment
- Youth, Parks, & Community Enrichment
- Youth, Parks, & Community Enrichment
Climate & Sustainability
- Maintenance Services
- Arts and Culture
- Arts and Culture
- Planning
- Planning
- Climate Action and Sustainability
- Climate Action and Sustainability
- Mobility and Sustainability
- Climate Action and Sustainability
- Arts and Culture
- Planning
- Public Works
- Public Works
- Procurement Services Division
- Recycling & Solid Waste
- Climate Action and Sustainability
- Building
- Recycling & Solid Waste
- Utilities
- Climate Action and Sustainability
- Utilities
Parks
- Youth, Parks, & Community Enrichment
- Arts and Culture
- Arts and Culture
- Youth, Parks, & Community Enrichment
- Public Works
- Youth, Parks, & Community Enrichment
- Youth, Parks, & Community Enrichment
- Arts and Culture
- Information Technology
- Arts and Culture
- Recycling & Solid Waste
- Youth, Parks, & Community Enrichment
- Youth, Parks, & Community Enrichment
- City of Sacramento
Scooters
- Transportation Planning
- Mobility and Sustainability
- Police Department
Sports
- Youth, Parks, & Community Enrichment
- Access Leisure
- Youth, Parks, & Community Enrichment
- Youth, Parks, & Community Enrichment
- Youth, Parks, & Community Enrichment
- Parks
- Mayor Kevin McCarty
- Parks
- Youth, Parks, & Community Enrichment
- Youth, Parks, & Community Enrichment
Swimming
- Youth, Parks, & Community Enrichment
- Youth, Parks, & Community Enrichment
- Youth, Parks, & Community Enrichment
- Aquatics
- Youth, Parks, & Community Enrichment
- City of Sacramento
Trails
- Park Planning & Development
- Arts and Culture
- Parks
- Transportation Planning
- Public Works
- Engineering
- Parks
- Arts and Culture
- Engineering
- Engineering
- Engineering
Trees
- Urban Forestry
- Parks
- Public Works
- Parks
- City of Sacramento
- Urban Forestry
- Urban Forestry
- Urban Forestry
- Climate Action and Sustainability
- Maintenance Services
Weather
- Fire Department
- Fire Department
- Planning
- Planning
- Parks
Category
local_police
Safety
Alternative Response
- Community Response
- Community Response
- City of Sacramento
- Office of the City Manager
Crime
- Police Department
- Police Department
- Police Department
- Police Department
- Police Department
- Police Department
- Police Department
- Police Department
- Police Department
- Fire Department
- Police Department
- Police Department
- Police Department
- Utilities
- Police Department
- Office of the City Auditor
- Office of the City Auditor
Emergency Management
- Fire Department
- Fire Department
- Join Sacramento Fire
- Fire Department
Emergency Response
- Fire Department
- Police Department
- Fire Department
- Join Sacramento Fire
- Join Sacramento Fire
- Emergency Management
Fire
- Fire Department
- Fire Department
- Fire Department
- Fire Department
- City of Sacramento
- Fire Department
- Fire Department
- Fire Department
- City of Sacramento
- Fire Department
Inspections
- Community Development
- Building
- Recycling & Solid Waste
- Fire Department
- Fire Department
- Fire Department
- Code Compliance
Police Department
- Police Department
- Police Department
- Police Department
- Police Department
- Police Department
- Police Department
- Police Department
- Police Department
- Police Department
- Police Department
- Police Department
- Police Department
- Police Department
- Police Department
- Police Department
- City of Sacramento
- Police Department
- City of Sacramento
- Police Department
- Police Department
- Police Department
- Police Department
- Police Department
- Police Department
- Police Department
- Police Department
- Police Department
- Police Department
- Police Department
Prevention & Personal Safety
- Emergency Management
- Police Department
- Information Technology
- Utilities
- Fire Department
- District 1 - Lisa Kaplan
- Mobility and Sustainability
Stormwater & Flooding
- Utilities
- Utilities
- Fire Department
- Utilities
- Utilities
- Utilities
- Utilities
- Utilities
- Utilities
- City of Sacramento
- Fire Department
Weather
- Fire Department
- Fire Department
- Planning
- Planning
- Parks
Category
directions_car
Transportation
Bicycles
- Transportation Planning
- Transportation Planning
- Arts and Culture
- Engineering
- Climate Action and Sustainability
- Planning
- Arts and Culture
- Transportation Planning
- Public Works
- Mobility and Sustainability
- Transportation Planning
- Engineering
- Transportation Planning
- Police Department
- Engineering
- Transportation Planning
Boating
- Public Works
- City of Sacramento
Driving
- Mobility and Sustainability
- Mobility and Sustainability
- Engineering
- Transportation Planning
- Arts and Culture
- Transportation
- Transportation Planning
- Public Works
- Transportation Planning
- Police Department
Electric Vehicles
- Parking
- Public Works
- Climate Action and Sustainability
Parking
- Police Department
- Marina
- Marina
- Mobility and Sustainability
- Public Works
- Planning
- City of Sacramento
- Public Works
- Transportation Planning
- Recycling & Solid Waste
- Public Works
Public Transportation
- Transportation Planning
- Engineering
- Transportation Planning
- Arts and Culture
- Engineering
- Engineering
- Transportation Planning
- Engineering
- Public Works
- Mobility and Sustainability
- Engineering
- Planning
Scooters
- Transportation Planning
- Mobility and Sustainability
- Police Department
Traffic
- Engineering
- Public Works
- City of Sacramento
- Public Works
- Police Department
- Police Department
- Public Works
- Transportation Planning
- Transportation
- Transportation Planning
- Transportation
- Transportation
- Engineering
- Transportation Planning
Walking
- Transportation Planning
- Arts and Culture
- Arts and Culture
- Arts and Culture
- Transportation Planning
- Engineering
- Transportation
- Transportation Planning
Category
delete_sweep
Utility Services
Drinking Water
- Utilities
- Utilities
- Utilities
- Utilities
- Utilities
- Utilities
- Utilities
- City of Sacramento
- Utilities
Recycling
- Recycling & Solid Waste
- Recycling & Solid Waste
- Recycling & Solid Waste
- Recycling & Solid Waste
- Recycling & Solid Waste
- Recycling & Solid Waste
- Recycling & Solid Waste
- Public Works
- Climate Action and Sustainability
- Recycling & Solid Waste
Trash
- Recycling & Solid Waste
- Recycling & Solid Waste
- Recycling & Solid Waste
- Recycling & Solid Waste
- Recycling & Solid Waste
- Recycling & Solid Waste
- Recycling & Solid Waste
- Recycling & Solid Waste
- Public Works
- Climate Action and Sustainability
- Recycling & Solid Waste
Wastewater & Sewer
- Utilities
- Utilities
- Utilities
- Utilities
- Utilities
- Utilities
- Utilities
- Utilities
- City of Sacramento
Search or ask
Type a search query or ask a question in the box above.
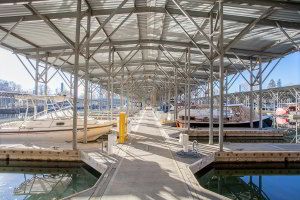


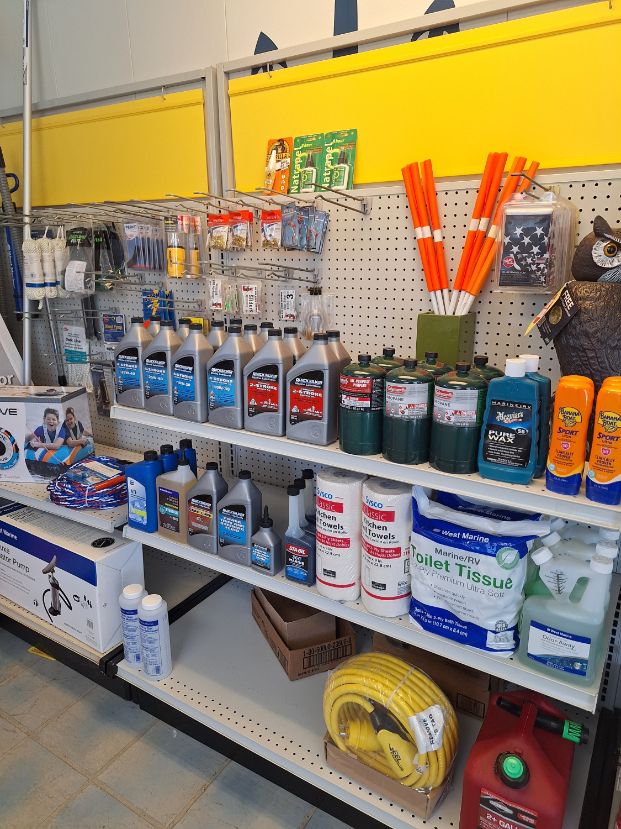
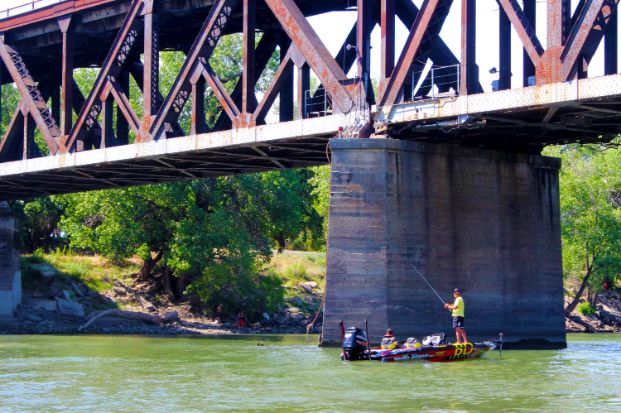

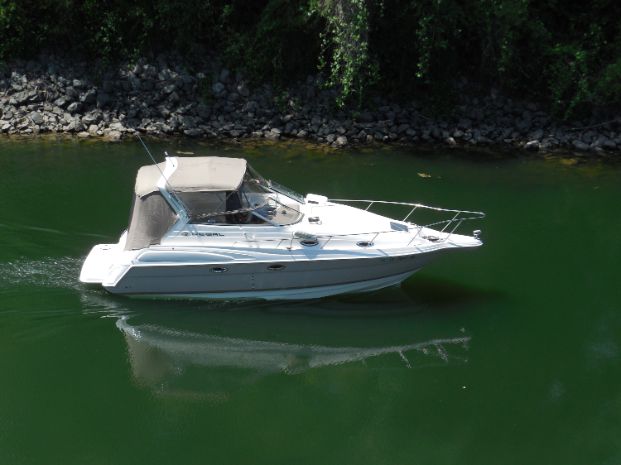

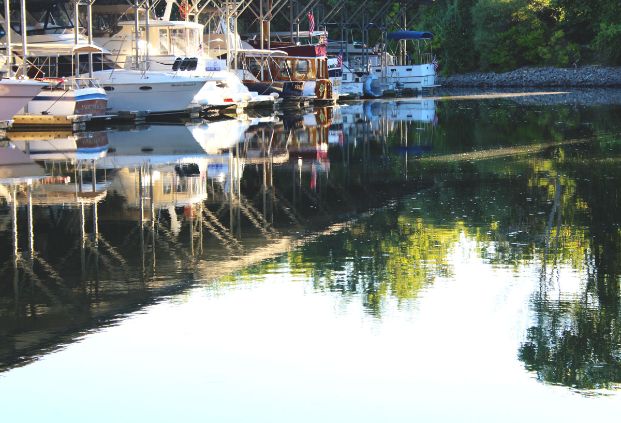
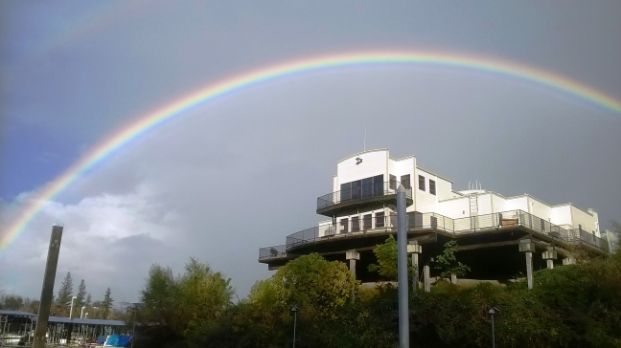
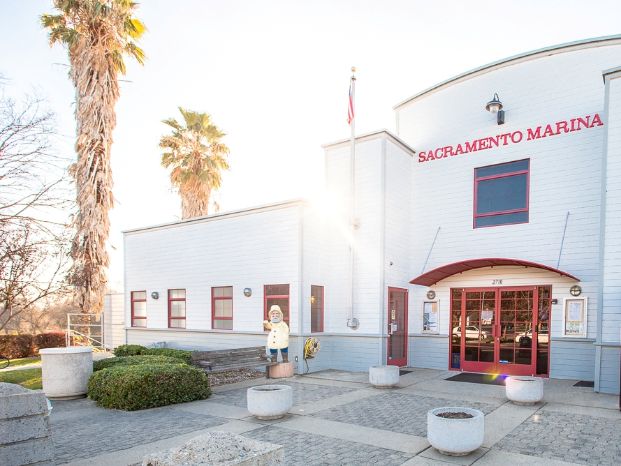
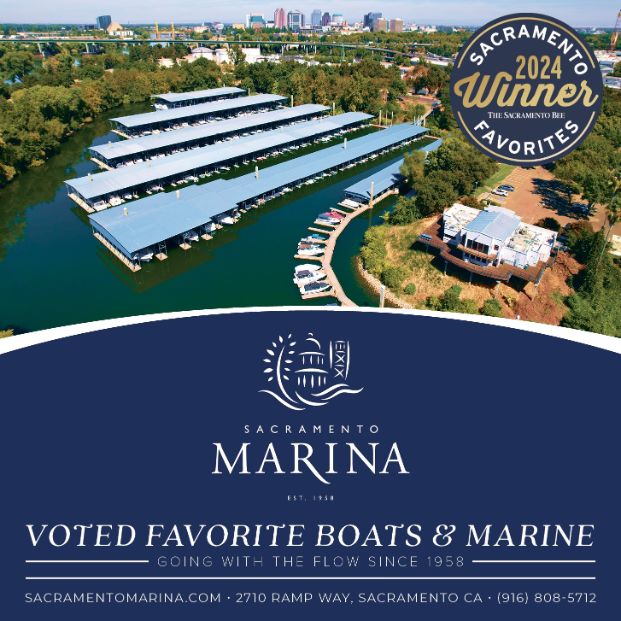

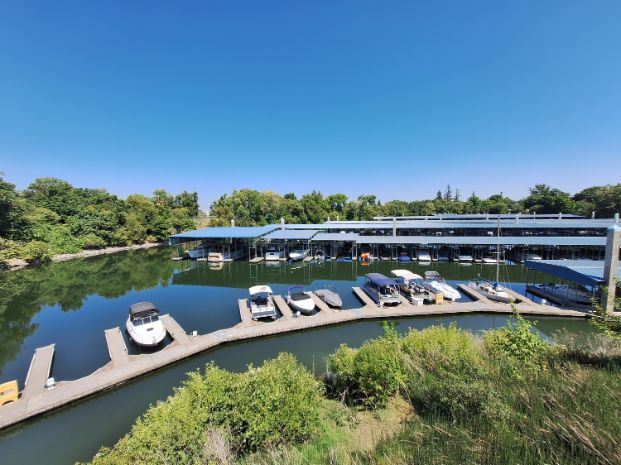
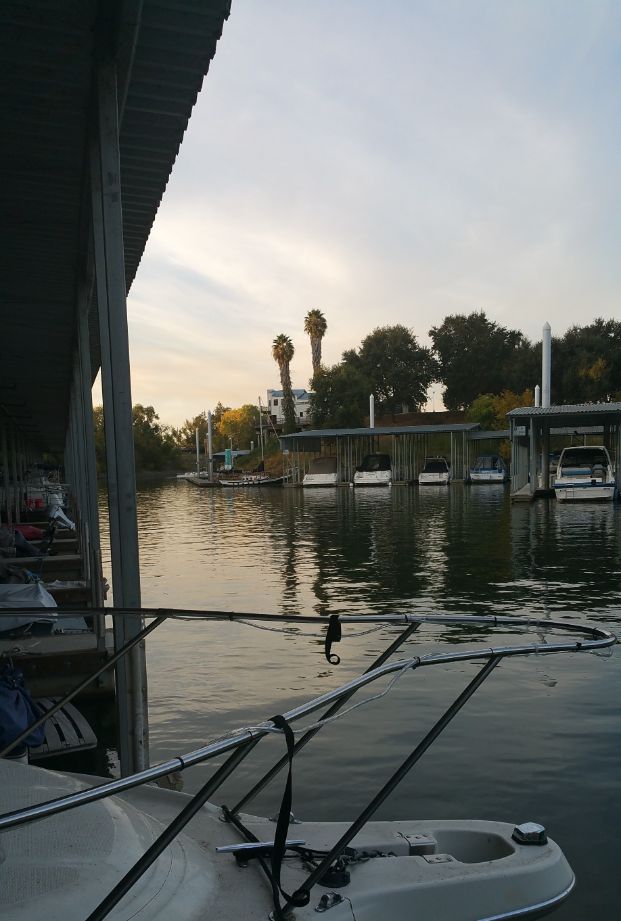


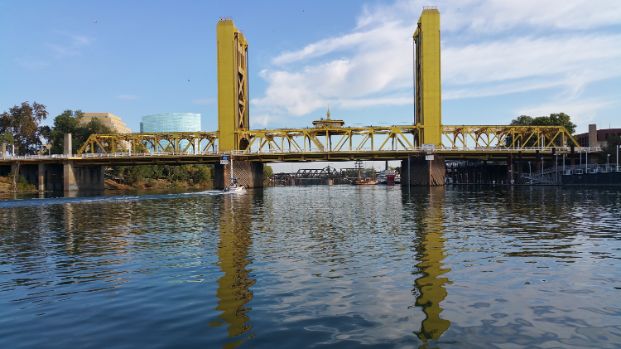
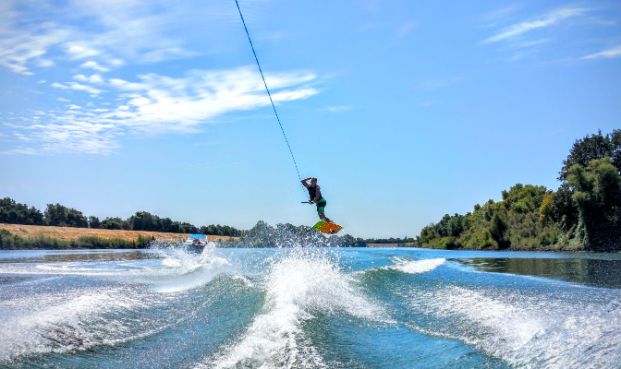
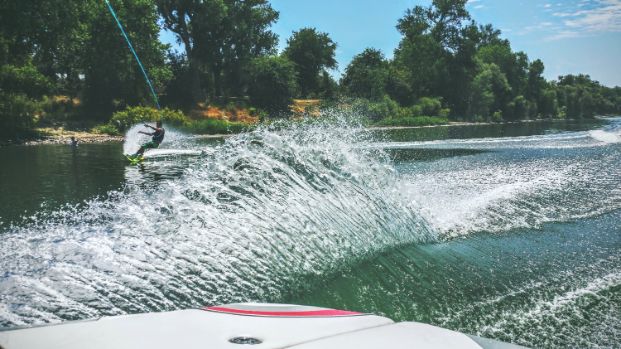
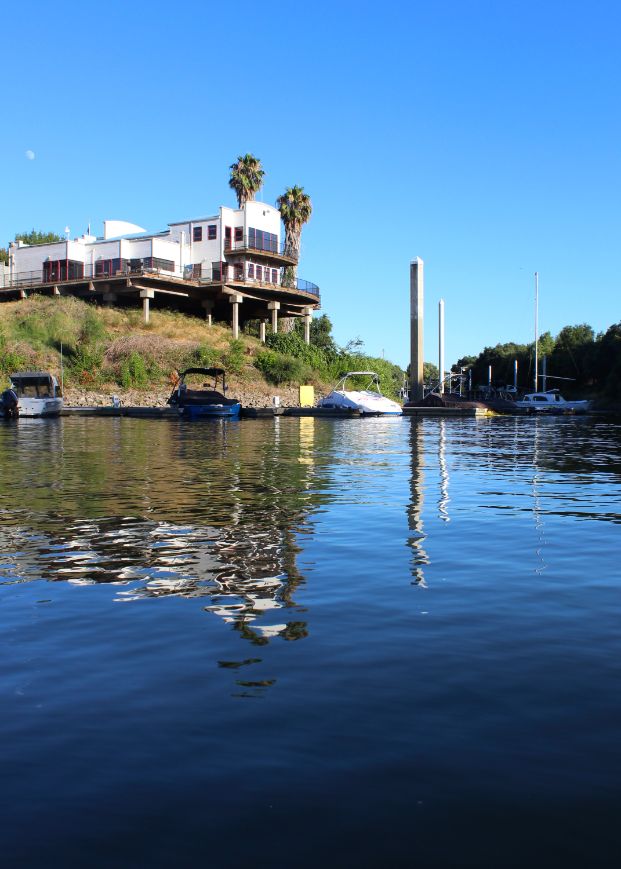
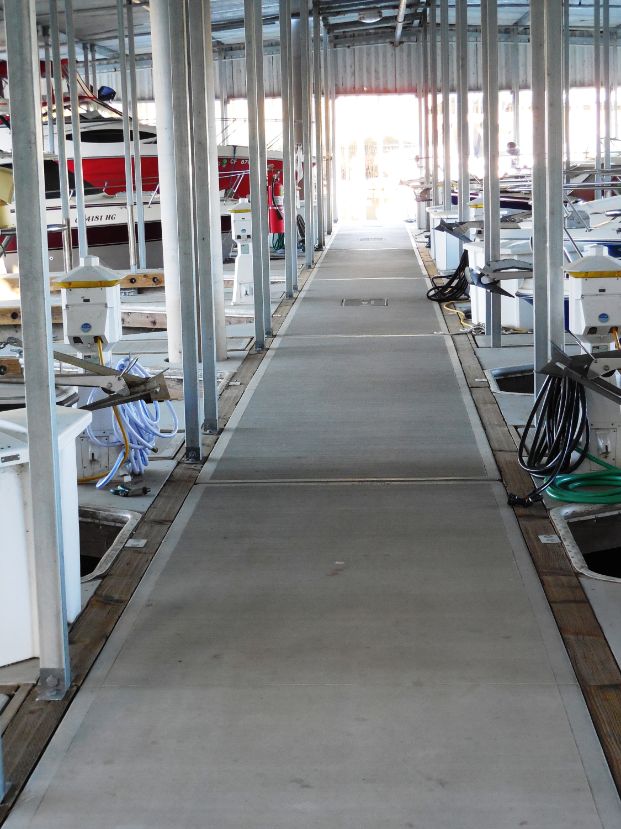
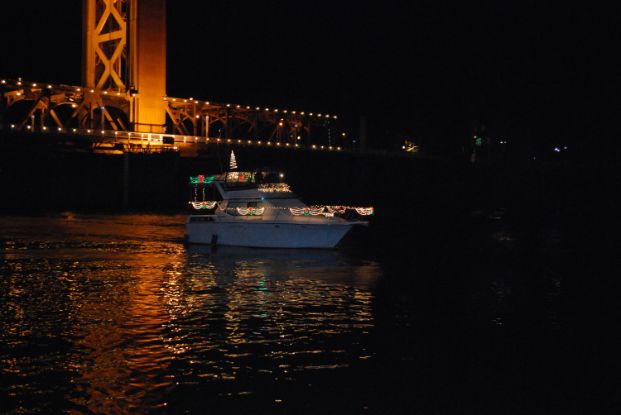
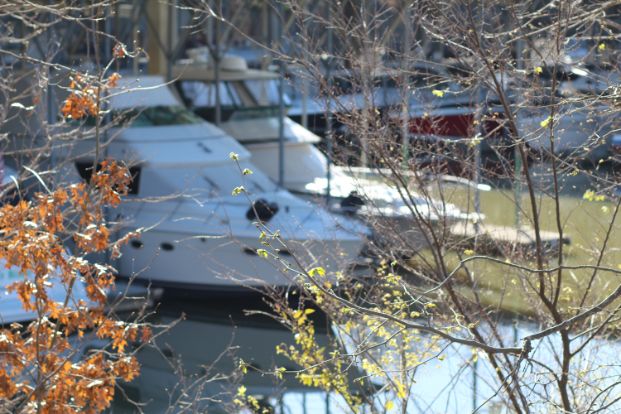
.JPG/_jcr_content/renditions/cq5dam.web.621.932.jpeg)

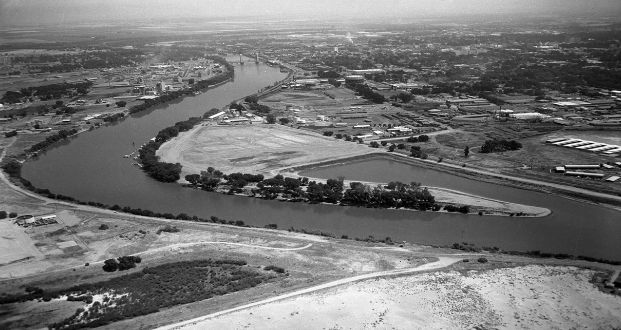
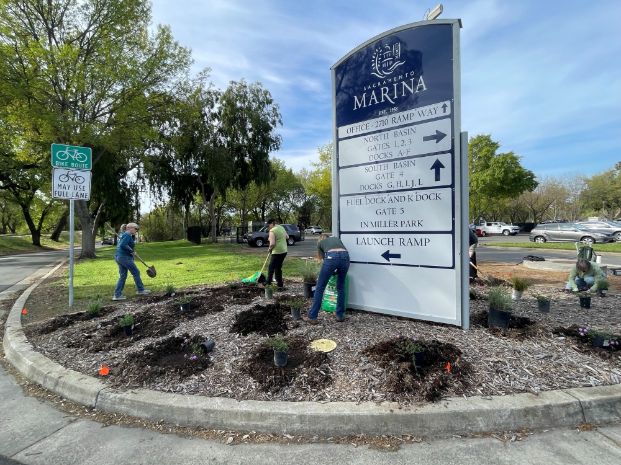
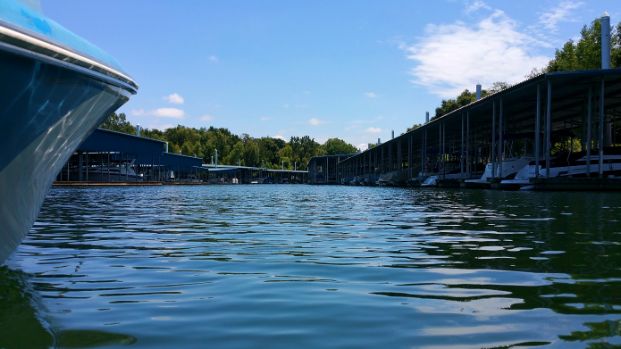
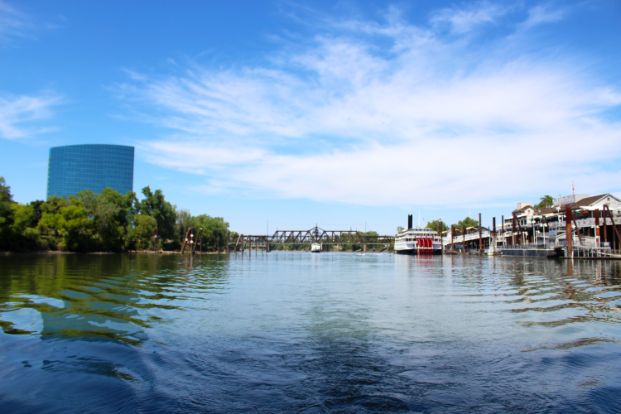
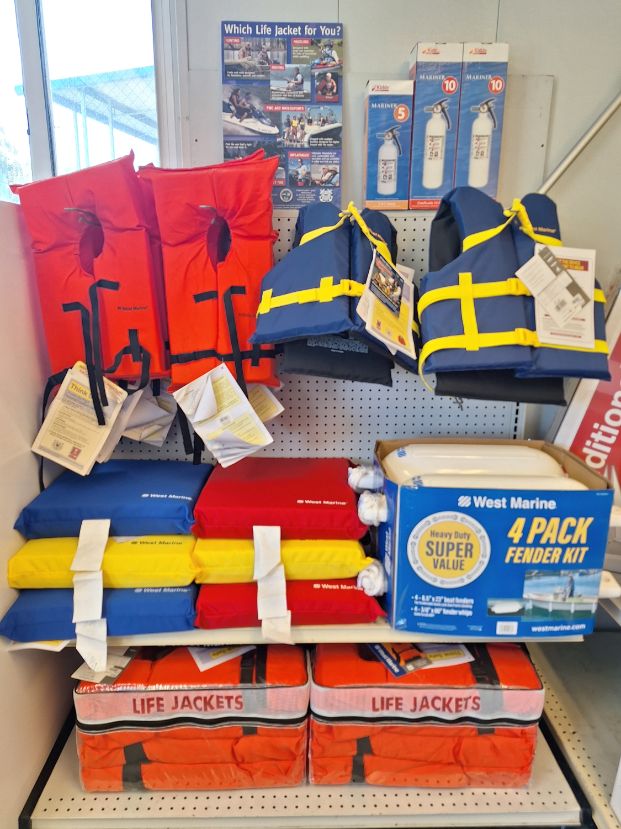

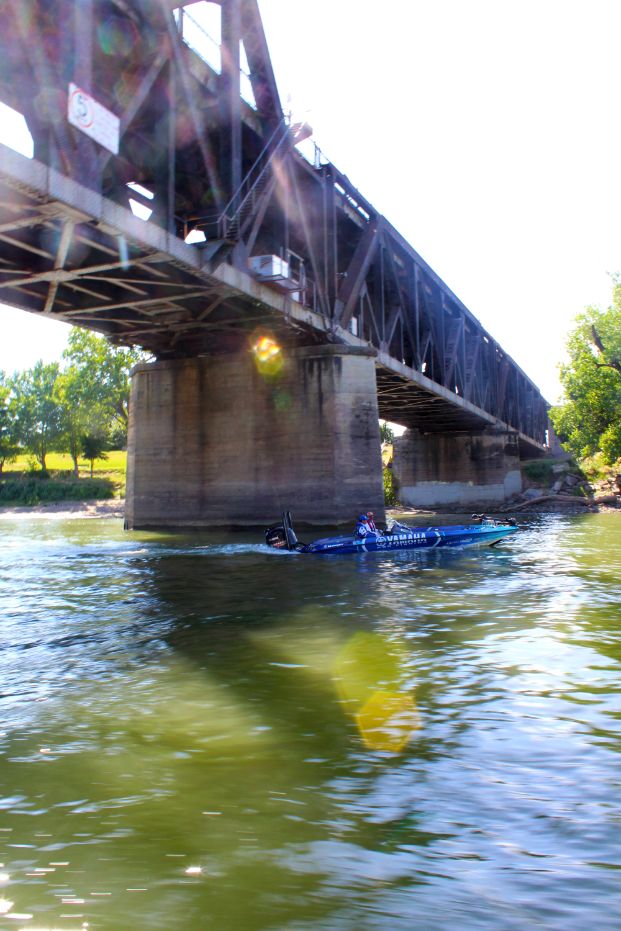
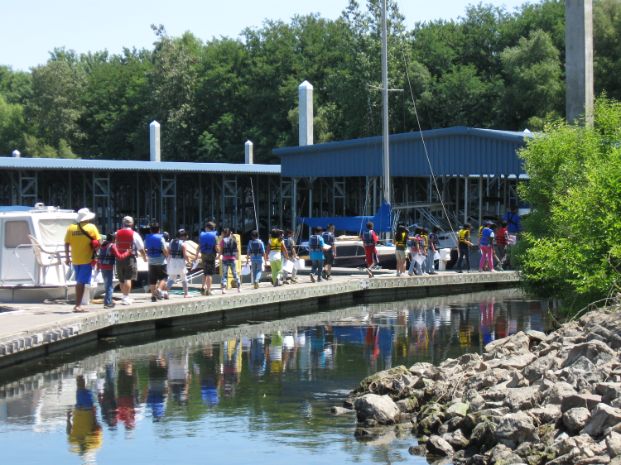
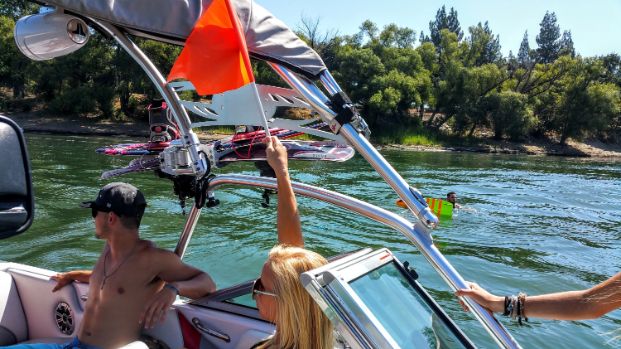
.jpg/_jcr_content/renditions/cq5dam.web.621.932.jpeg)